How Can We Help?
Setting Up Book Cover Artwork
In this section, we will show you how to set up your book cover(s) for each type of book format we offer.
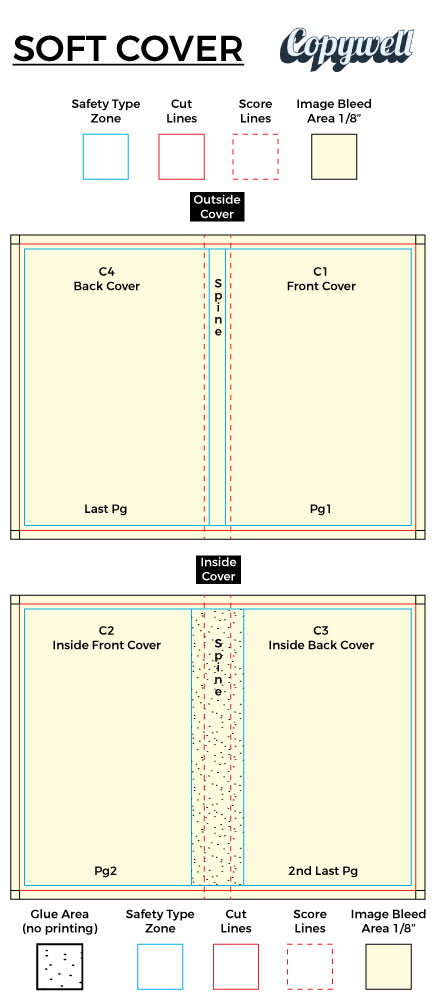
Softcover Perfect Bound Books
Covers for softcover books need to be setup as spreads with a specific spine width according to the page count and paper type used. This information will be provided to you on your quotation The diagram below illustrates the layout for the outside and inside covers.
Remember to setup with at least 1/8″ bleeds and maintain a safe text margin of at least 1/4″
Hardcover Perfect Bound Books
With a hardcover book, we print a sheet of paper and glue it to a thick board in a process known as casewrapping. This process is necessary because a board cover is too thick to be printed on most conventional printing equipment. To setup your casewrap, you need to ensure an increased bleed area that we refer to as the “case wrap allowance” or “turn in allowance”.
How to Setup Your Casewrap Graphics for Hardcover Book Printing
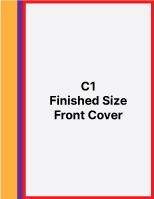
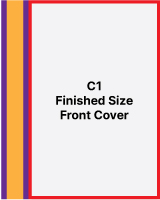
1. Determine the Front Cover Finished Size and Create the Front Cover.
The interior page size of your book will need a cover that is slightly larger on each edge to create a hardcover book. The formula we use to determine the cover finished size as follows:
- Interior Page Width – 1/8”
- Interior Page Height + 3/8”
Example: If the interior page size is 6” wide by 9” high, then we would have a cover finished size of:
(Interior Page Width: 6)- (0.125) = Front Cover Finished Width 5.875“
- 6 – 0.125 = 5.875
(Interior Page Height: 9) + (0.375) = Front Cover Finished Height 9.375″
- 9 + 0.375 = 9.375
Front Cover Finished Size = 5.875“ x 9.375”
Now to start designing your casewrap graphics, start by creating a box that is 5.875” wide x 9.375” high. This is now the Front Cover Finished Size, also known as C1, and will be the front cover of your book. Now we work around this element to create the other parts of the template, such as the spine and back cover.
2. Create the Front Cover Joint
Create the front cover joint and position it adjacent to the left edge of the C1. The joint width is going to be 3/8” (0.375“) wide and the same height as the finished front cover. The joint is the area where the cover will be folded, like a hinge, so you need to avoid text in this area because it will become warped when bound.
Example: 0.375” wide x 9.38“ high
3. Add the Outer Case Spine
Next, add the Outer Case Spine to the left of the Front Cover Joint, adjacent to the left edge. This will be the book spine and text must be positioned at least 1/16″ (0.0625″) away from the edges.
The Outer Case Spine will be provided to you on your quotation and is calculated based on the interior sheet count and thickness.
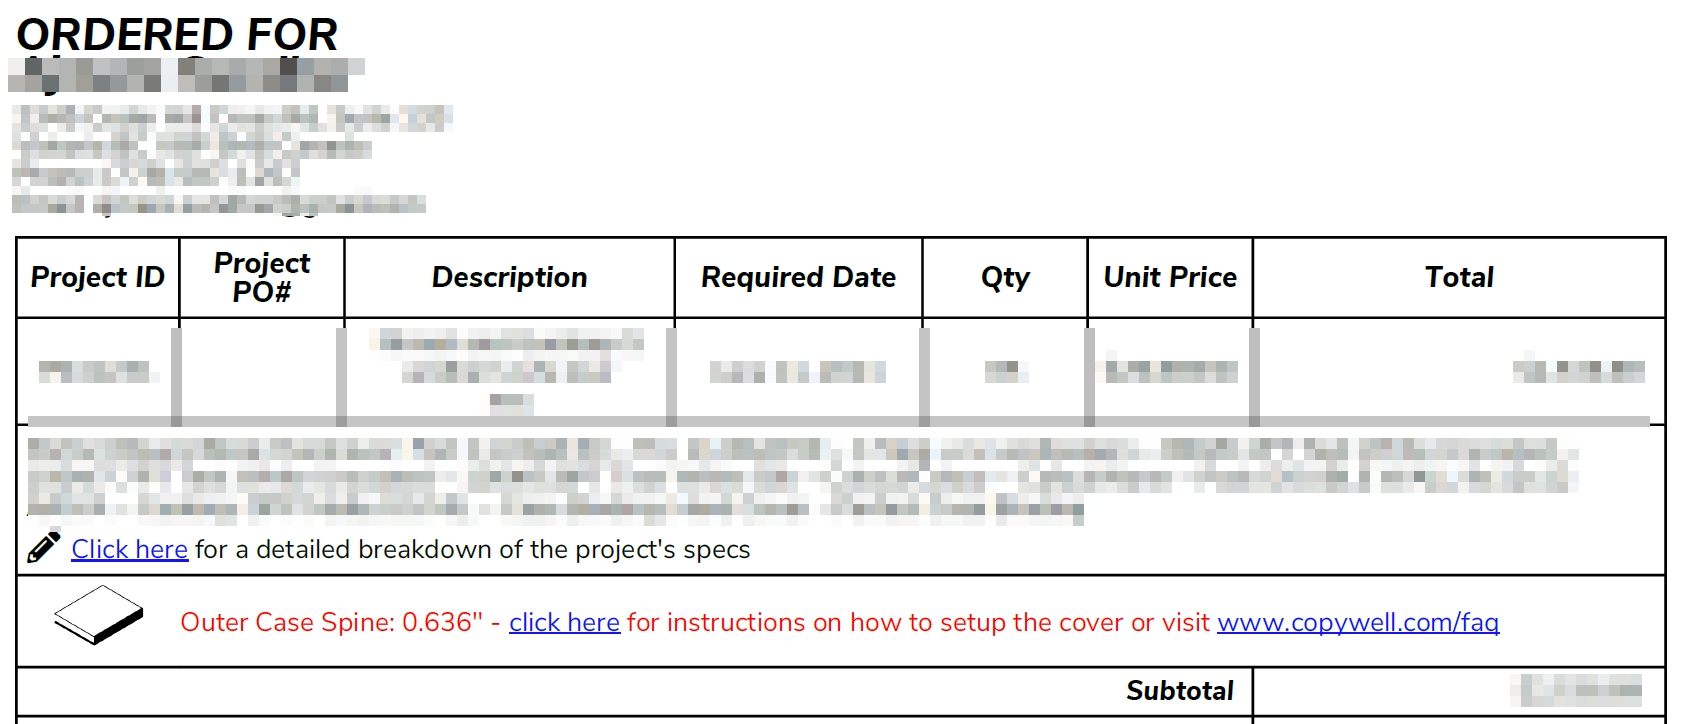
Create a box that is 0.636″ wide by the same height as the other elements.
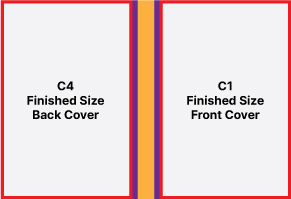
4. Add the Back Cover Joint
Next, add the Back Cover Joint by copying the Front Cover Joint and positioning it to the left of the Outer Case Spine.
Remember, there can be no text in this area because it will become warped when bound.
5. Add the Finished Size Back Cover
Next, add the Finished Size Back Cover by copying the Finished Size Front Cover and positioning it to the left of the Back Cover Joint.
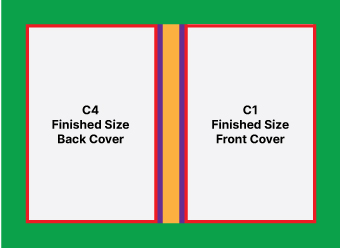
6. Add the Casewrap Bleed Allowance
Next, add the Casewrap Bleed Allowance to finish the template elements. This area must be at least 11/16” (0.6875”) on each edge to allow the casewrap to be wrapped around the board that makes the hardcover outer case. This area should not contain any text, as it will not be legible when bound. The elements in this area will not be visible when bound.
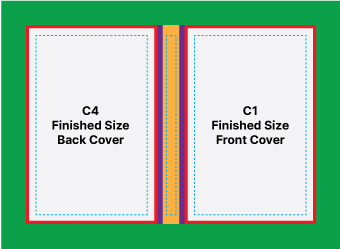
7. Define Safety Text Areas
The Safety Text Area is where text is guaranteed to be legible. The safety text area should be 1/4” away from the finished front and back cover, and 1/16” away from the outer case spine edges. In the diagram below, the safety text area is inside the blue dashed lines, so any text should not be outside of this area.
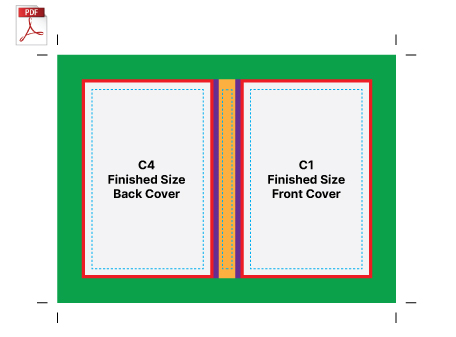
8. Set Your Artboard to the Size of The Casewrap Bleed Boundaries & Save As PDF With Trim Marks
The last step in the process is to set your artboard size to the dimensions of the casewrap bleed allowance area. In the diagram below, the green area is the casewrap bleed allowance area, and export with trim marks. It’s a good idea to save the template separately, in case you need it later for another try or new concept.
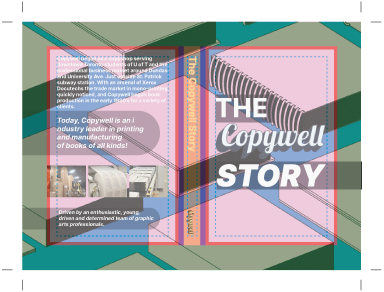
9. Design Your Artwork
Now the fun part, go ahead and design your cover. Use the template as a guide to position text and artwork, we suggest setting the template layer to 50% opacity and locking it in a separate layer.
Click here to download a PDF of the example above at full scale with the template.
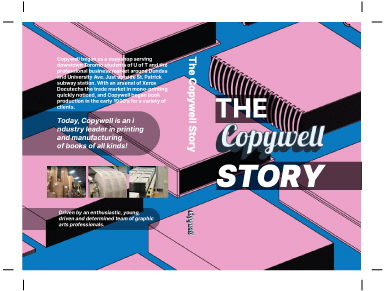
10. Save As PDF With Trim Marks and Send to Print
Lastly, remove the template layer and save as a PDF with trim marks. In the diagram below, the template is removed and saved as a PDF with trim marks. Now it’s ready to print!
The final book will look great if you follow these instructions, and you can always reach out to your customer service representative for help or guidance.

Saddle Stitched Booklets
Remember to ensure that your overall page count is a multiple of 4, as these books print in 4 page signatures.
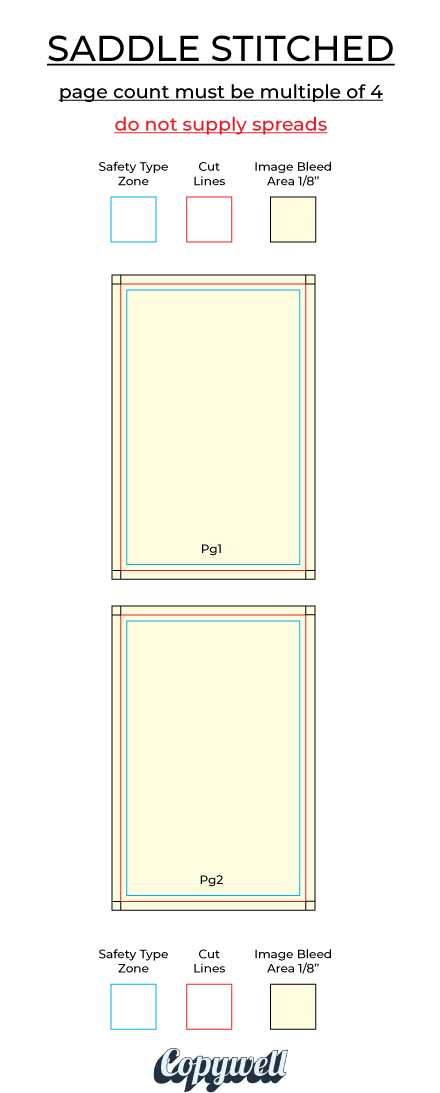
Remember to setup with at least 1/8″ bleeds and maintain a safe text margin of at least 1/4″
Wire & Plastic Coil
With a wire bound or plastic coil bound book, just supply files as single pages, not spreads.
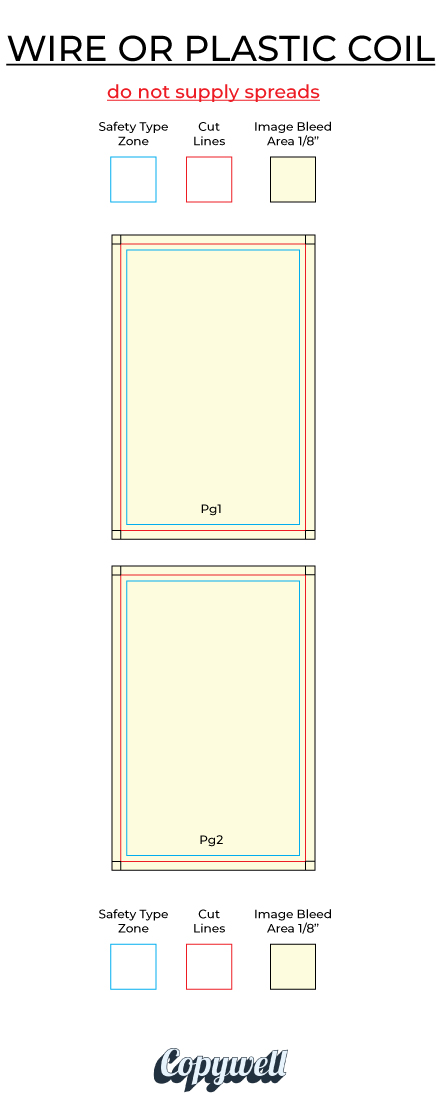
Remember to setup with at least 1/8″ bleeds and maintain a safe text margin of at least 1/4″